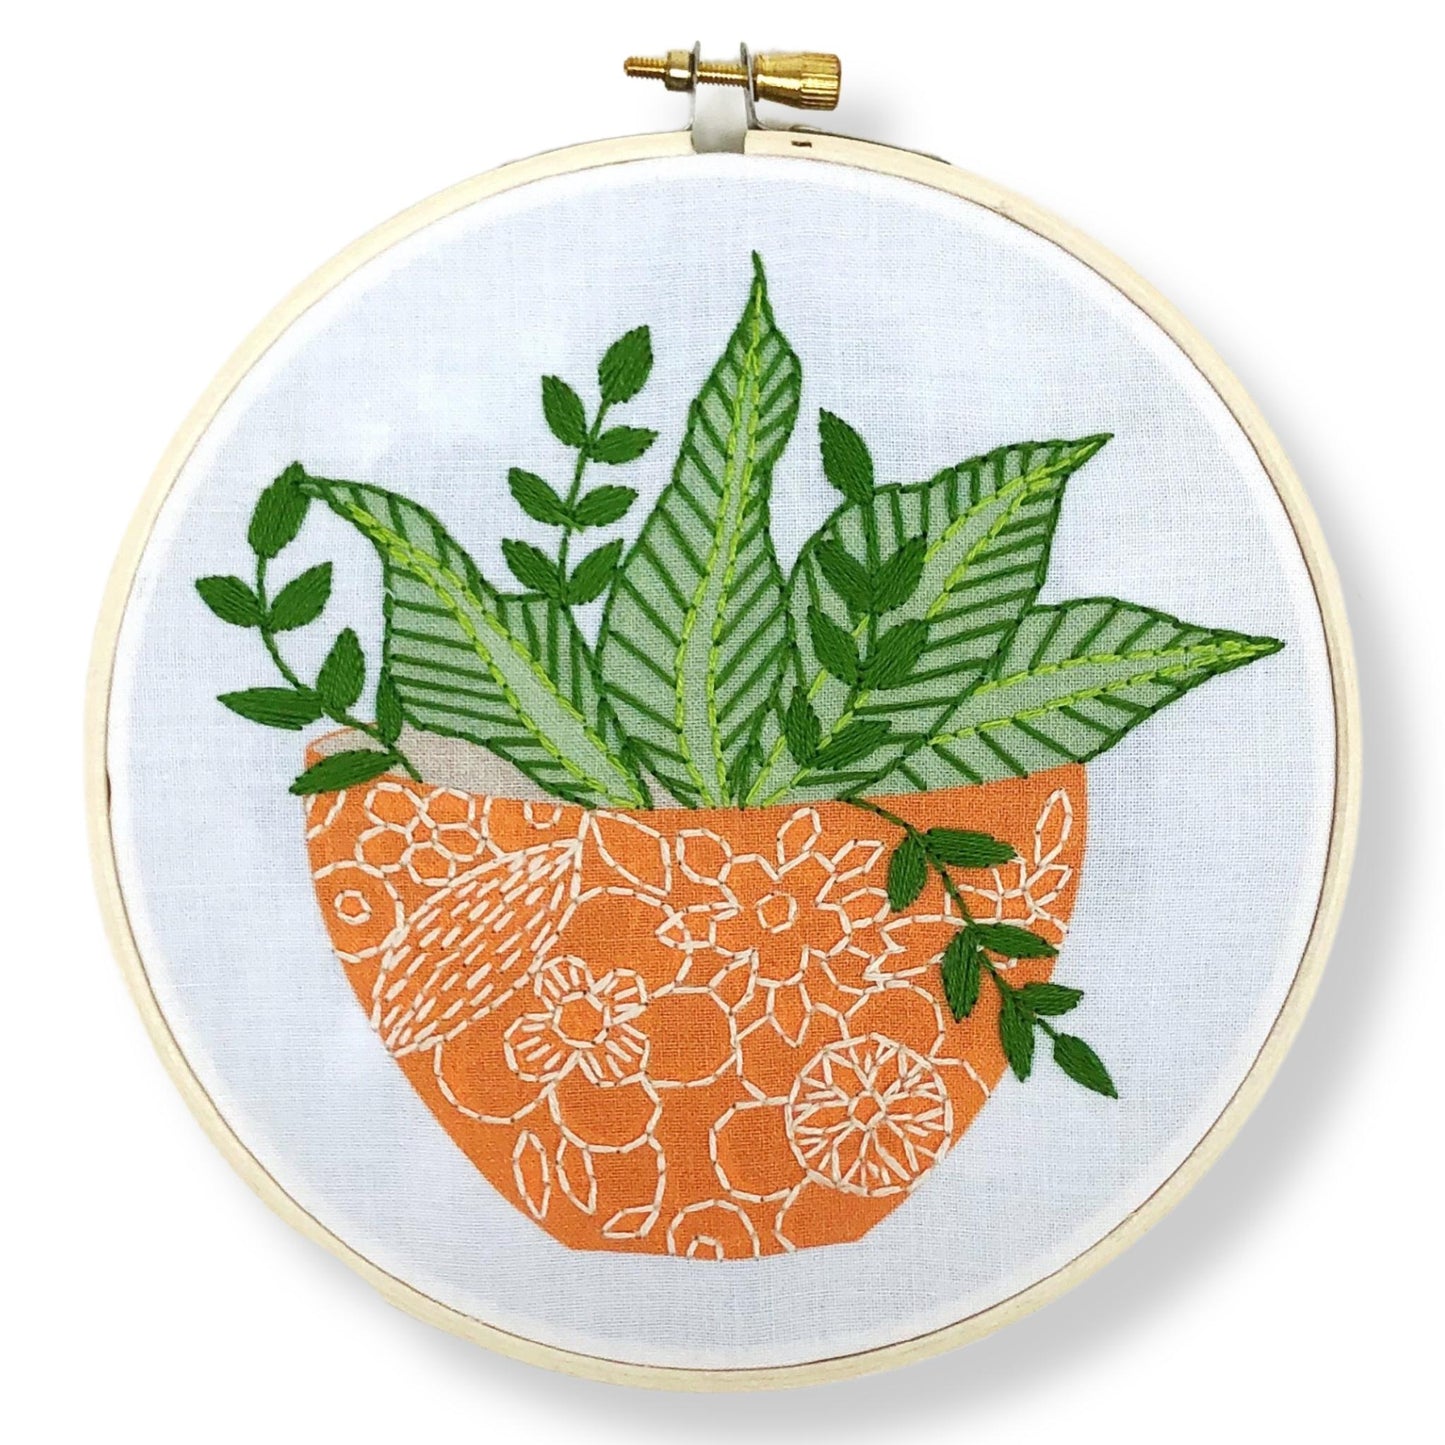
Stitches used: Satin Stitch, Back Stitch, and Seed Stitch
Colors: DMC 907, 905, and Ecru
Stitch Details
Lt Green DMC 907 is used to back stitch leaf veins. Dk Green DMC 905 back stitch is used for vein stems, outline of large leaves, and satin stitch for small green leaves.
Create first stitch through the center of the leaf and then fill in one half and then the other. One stitch for each stripe on large leaves.
DMC Ecru is used on the flower pot pattern. Seed stitch for the dotted pattern on flower centers and pattern on leaf. Backstitch for everything else.
* Be sure to secure your thread on the back by running your needle under existing stitches when first starting a new piece of floss and when you are ending a piece. It is important to do this behind a printed area so that you can cut out any stray threads that would show through the white fabric from the front. You should also do this if you need to move from one leaf to the next and your floss will show from the front. This will allow you to cut the floss in between the leaves so it will not be seen from the front and the floss won’t come loose. Another solution I have seen some folks use is to add a layer of white fabric behind the pre printed fabric to make the image more opaque.